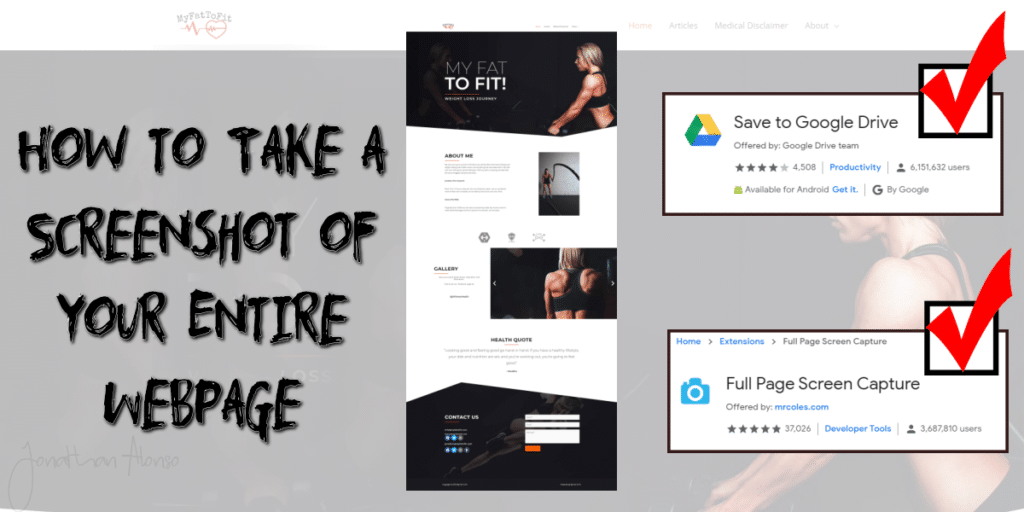
Are you someone who frequently needs to take screenshots for work or personal use? If so, you might have experienced the frustration of not being able to capture the entire webpage or having to take multiple screenshots. In this article, I will introduce you to two free and useful Chrome extensions that not only allow you to capture the entire webpage, but also provide additional features to enhance your screenshot experience. Screen captures have a wide range of applications, from educational purposes to social media posts, and these tools will help make the process much more efficient and effective.
‘Save to Google Drive (By Google)‘ and ‘Full Page Screen Capture‘
Both Chrome extensions are FREE and very easy to use. I will first review ‘Save to Google Drive’ (by Google), and then follow up with ‘Full Page Screen Capture’ further down in the article. First, if you don’t have Chrome, you can download it directly from Google at this LINK.
System Parameters to Install and Test Screen Capture Extensions
Test System: Unit to test both installs is a 64-bit system, running dual Intel Core i7’s, with 16 GB of Ram, and a display resolution of 1920×1080. This information will become more important when reviewing the actual capture resolutions and my test on the World’s Longest Webpage.
Save To Google Drive By Google
Step 1 – Visit the Chrome Web Store
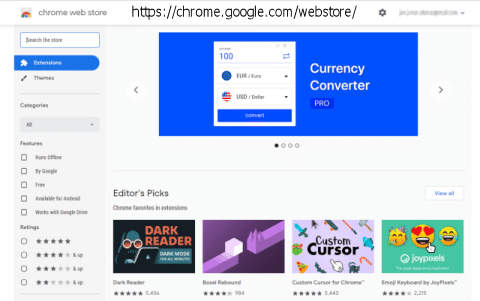
Go to the Chrome Web Store at Chrome.Google.com/Webstore.
Step 2 – Search for ‘Screen Capture’
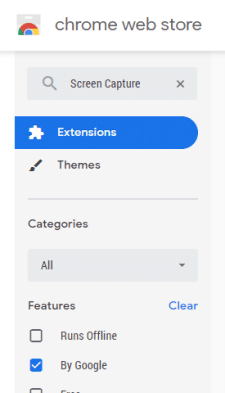
Search for “Screen Capture” in the search box and make sure to click ‘By Google‘ under the left Features section.
Step 3 – Save to Google Drive (Add)
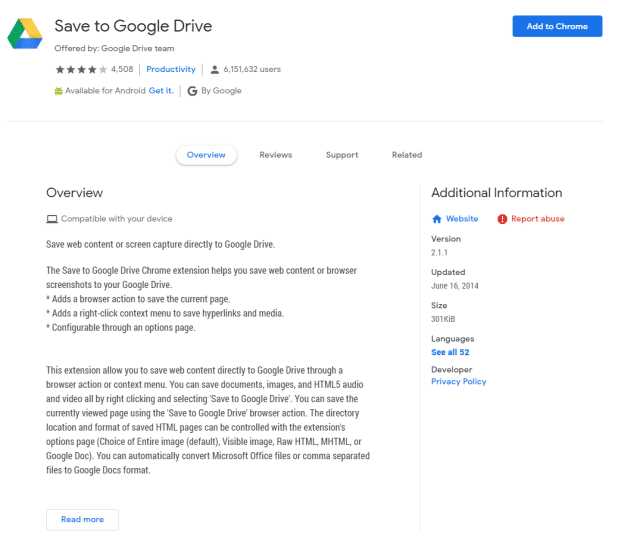
On the search results, you will see ‘Save to Google Drive’ (picture and info below). Simply click the ‘Add to Chrome‘.
Step 4 – Confirmation (Add Extension)
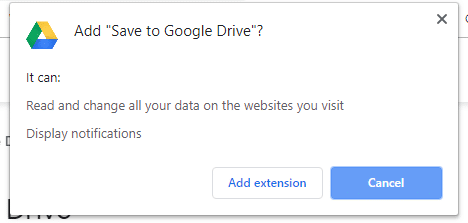
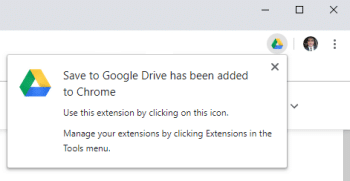
Make sure to confirm your installation and click ‘Add Extension‘.
Step 5 – Using ‘Save to Google Drive’
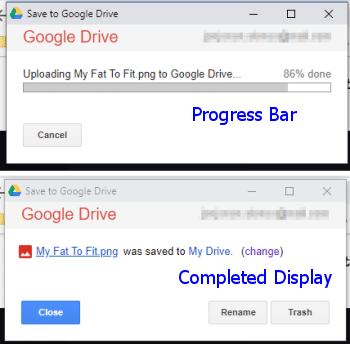
At this point, simply visit the website you would like to capture. In my example, I am using a website (www.FatToFit.com). Upon visiting the page, ‘Left Click‘ the Google Icon and let the magic work. At that point, the extension takes over and you will see Chrome scrolling down to capture the whole page (Progress Bar) once finished, a pop-up will display your completed URL link.
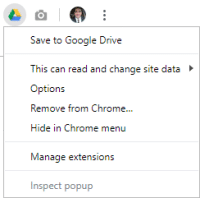
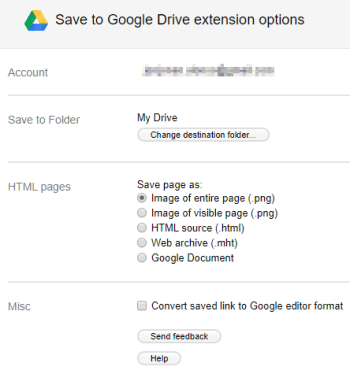
NOTE: Your default settings can be accessed by ‘Right Clicking‘ the Google Icon, and then left-clicking on Options (explained further down).
Save to Google Drive – Final Results
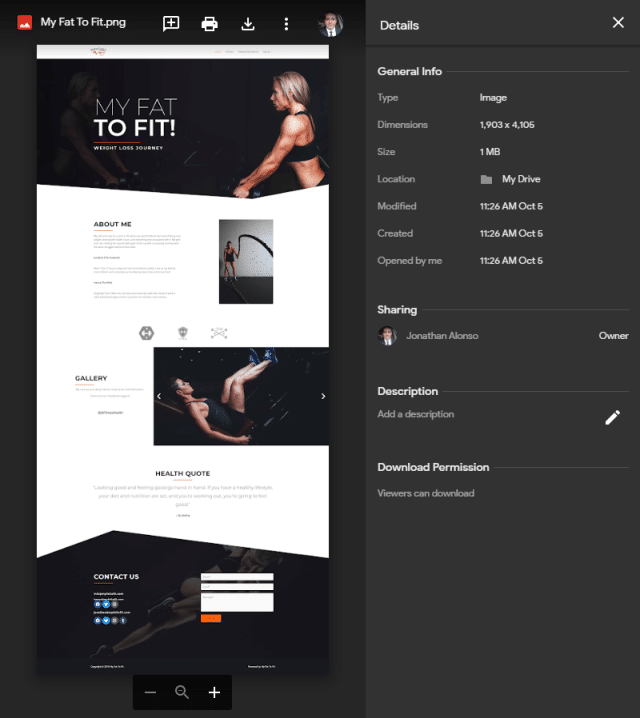
After completing its task, Save to Google Drive will display a linkable text link taking you directly to your Google Drive. Simply click the text link and it will take you directly to your finished image.
Without any configuration or adjusting any options, Save to Google Drive is set to capture in image mode (PNG) and in my test result in an image with a pixel size of 1903 x 4106.
Looking into the options menu, you have several modes to select from starting with PNG images, HTML (both HTML and MHT), and lastly a Google Document.
Full Page Screen Capture (By MrColes.com)
Step 1 – Visit the Chrome Web Store
Go to the Chrome Web Store at Chrome.Google.com/Webstore.
Step 2 – Search for ‘Full Page Screen Capture’
Search for “Full Page Screen Capture” in the search box.
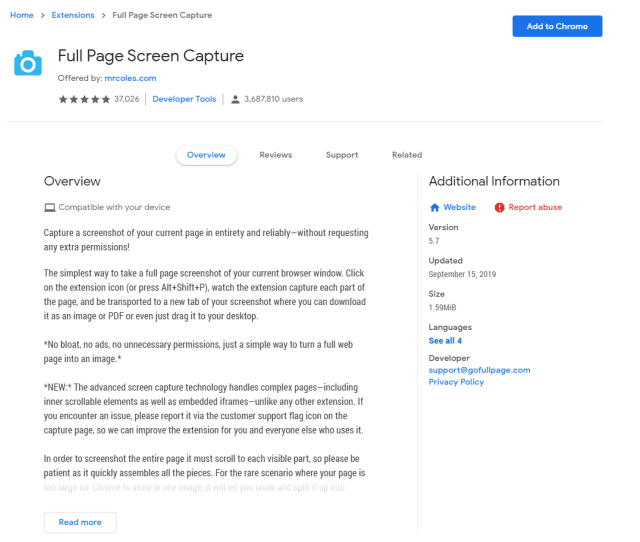
Step 3 – Full Page Screen Capture (Add)
On the search results, you will see ‘Full Page Screen Capture’ (picture and info below). Simply click the ‘Add to Chrome‘.
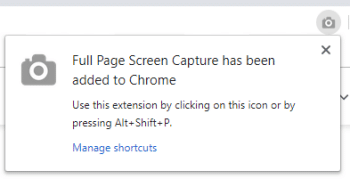
Step 4 – Confirmation (Add Extension)
Make sure to confirm your installation and click ‘Add Extension.
Step 5 – Using ‘ Full Page Screen Capture ’
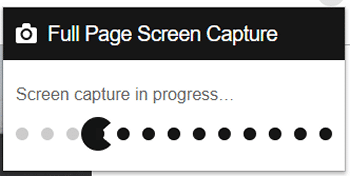
To initiate a screenshot, visit the website you would like to capture. In my example, I am again using www.FatToFit.com (To give a side-by-side comparison). Once there, simply ‘Left Click on the camera icon in the Chrome Bar, and let the magic work. The extension takes over and a progress pop-up will appear displaying the overall task (Similar to PacMan).
Full Page Screen Capture – Final Results
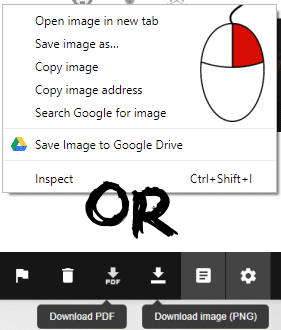
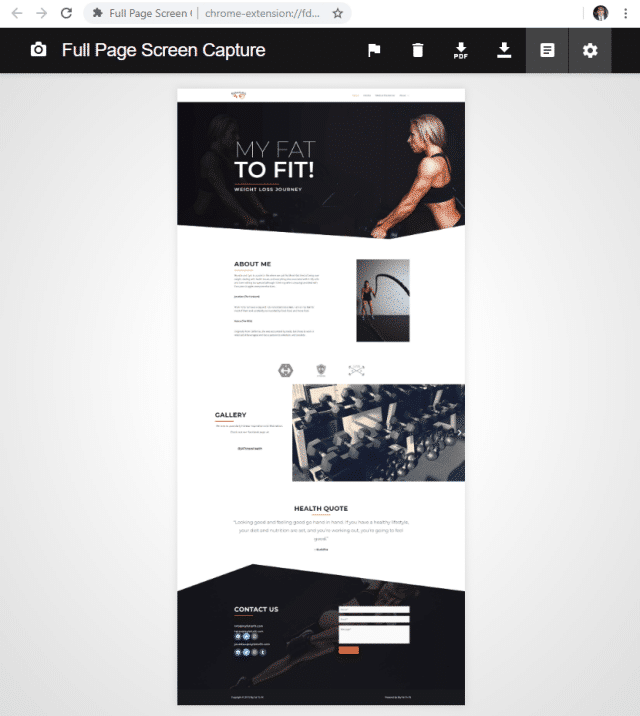
After completing its task, Full Page Screen Capture will open a new tab and display your image. From there, you can ‘Right Click’ on the image and save it directly to your local drive; OR you can utilize ‘Full Page’s menu‘ above and save it as a PDF or PNG. The final image generated was saved at 1831 x 4081px (32 Bit | 1.50 MB Size)
Full Page Screen Capture – Options Menu
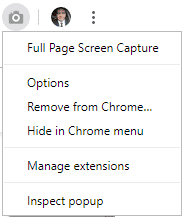
To access the options menu, ‘Right Click the camera icon on the upper right-hand side of Chrome. The Full Page Screen Capture menu will pop up and simply go down to Options and ‘Left Click‘.
At the ‘Full Page Screen Capture’ Options Menu, you have the option to select your default image type (PNG or JPG); default local directory (to save your image); PDF default sizing; Automatic Local Save; and Auto-download.
My Recommended Settings
Keeping things simple, I recommend the following settings.
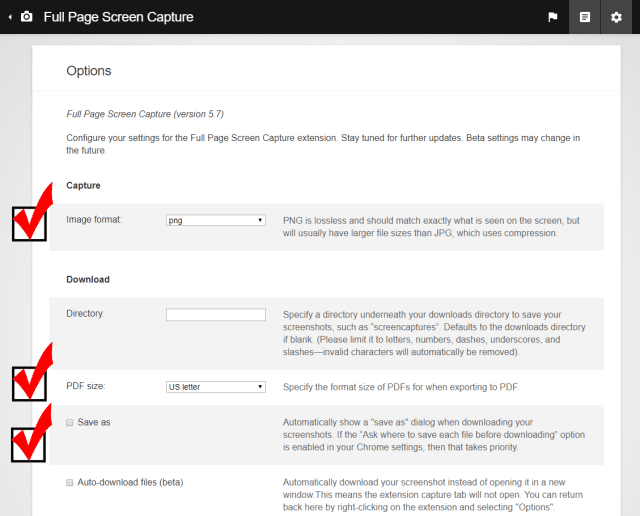
- Keep the Image Format with PNG
- Prefer to maintain the overall Quality and Transparency options as I go forward.
- PDF size: set to ‘Full Image
- Why? I do not want the screenshot to be modified in any way and keeping the default PDF size to anything except Full Image will risk the process in modifying the final results (ie image size/width and height)
- Save as – I selected this option as most of the time my screen captures are job-specific and I simply don’t want to jump into Explorer and move them around at a later date.
Screenshot Capture Test Against the World’s Longest Webpage
To feed a bit of curiosity, I wanted to test both of these extensions by finding a very long webpage and verifying if their final image width would change depending on the length of a webpage. So with that, I jumped on the Guinness of World Records website and found a site actually called ‘World’s Longest Website © 2008-2015 A. Gaehwiler’. Here is the LINK!
Save To Google Drive – Test
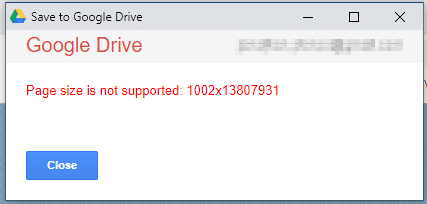
First up to bat was Google. Almost immediately after clicking Go, Save to Google Drive displayed the following message.
Full Page Screenshot – Test
Next up to was ‘Full Page Screen Capture’ (FPSC). FPSC took off running and as usual, the PacMan progress screen popped up and lasted for about 8 seconds until it cried uncle and crashed (had to reboot Chrome).
World’s Longest Webpage Screenshot Summary
Although both extensions failed; I will say that I have a lot of respect for Google’s programming team. Based on its performance, Save To Google Drive conducted a quick test to identify the parameters/integrity of the screen capture job and canceled showing the test wasn’t reasonable. Where FPSC took off running straight out of the gate crashing after it realized it couldn’t do the job.
Now to be fair to both programs, the overall test was totally unfair as an image for a webpage of that size would’ve generated a pixel resolution of 1002 x 13807931 (Thanks Google for the data). That would equate to an overall resolution of 13.8 gigapixels equalling about 13.8 billion pixels with typical file sizes easily ranging into several gigabytes. Just for fun, here are the actual file sizes of an image pixel dimension of 1002 x 13807931:
- JPG 100% 24bit/pixel 2.83 GB
- JPG 90% 24 bit/pixel 1.41 GB
- GIF 8bit/pixel, 255 colors 4.24 GB
- PNG lossless 24bit/pixel 8.04 GB
- Lossless JPEG 20.8 GB
- Canon sRAW CR2 12.1 GB
- Canon mRAW CR2 18.2 GB
- Nikon NEF 14-bit uncompressed 24.2 GB
- Nikon NEF 14-bit lossless compressed 13.4 GB
- Nikon NEF 14-bit compressed 11.7 GB
- TIFF Monochrome 8bit/pixel 13.8 GB
- RAW/DNG 10 bits/pixel 17.3 GB
- RAW/DNG 12 bits/pixel 20.8 GB
- RAW/DNG 14 bits/pixel 24.2 GB
- RAW/DNG 16 bits/pixel 27.7 GB
- BMP RGB 3×8 bit/pixel 41.5 GB
- OPENEXR RGBA 4×16 bit/pixel 111 GB
- TIFF/DPX Monochrome 8bit/pixel 13.8 GB
- TIFF/DPX RGB 3x8bit/pixel 41.5 GB
- DPX RGB 3x10bit/pixel 51.9 GB
- TIFF/DPX RGB 3x16bit/pixel 83 GB
- TIFF/DPX RGBA 4×8 bit/pixel 55.3 GB
- DPX RGBA 4×10 bit/pixel 69.2 GB
- TIFF/DPX RGBA 4×16 bit/pixel 111 GB
- OPENEXR RGBA 4×16 bit/pixel 111 GB
- OPENEXR RGB 4×32 bit/pixel 221 GB
Here is how long it would take to download at a speed of 1.544 MBPS:
- JPG 100% 24bit/pixel 2.83 GB = 4 Hours 22 Minutes
- PNG lossless 24bit/pixel 8.04 GB = 12 Hours 25 Minutes
- Lossless JPEG 20.8 GB = 1 Day 7 Hours 1 Minute
- BMP RGB 3×8 bit/pixel 41.5 GB = 2 Days 16 Hours 8 Minutes
- DPX RGB 3x10bit/pixel 51.9 GB = 3 Days 8 Hours 12 Minutes
- DPX RGBA 4×10 bit/pixel 69.2 GB = 4 Days 10 Hours 56 Minutes
- TIFF/DPX RGB 3x16bit/pixel 83 GB = 5 Days 8 Hours 16 Minutes
- OPENEXR RGBA 4×16 bit/pixel 111 GB = 7 Day 3 Hours 32 Minute
- OPENEXR RGB 4×32 bit/pixel 221 GB = 14 Days 5 Hours 31 Minutes
Here is what it would take to print out a file of 1002 x 13807931:
- 10 dpi billboard 100.2″ x 1380793.1″ = 960802 sq ft
- 72 dpi newspaper 13.9″ x 191776.8″ = 18534 sq ft
- 96 dpi minimum 10.4″ x 143832.6″ = 10425 sq ft
- 150 dpi magazine 6.7″ x 92052.9″ = 4270 sq ft
- 240 dpi inkjet printer 4.2″ x 57533.0″ = 1668 sq ft
- 300 dpi inkjet printer 3.3″ x 46026.4″ = 1068 sq ft
- 600 dpi laser printer 1.7″ x 23013.2″ = 267 sq ft
- 1200 dpi high-end printer 0.8″ x 11506.6″ = 66.7 sq ft
The tool I used to identify image file sizes and print square feet was provided by Megapixel Calculator Tool and https://toolstud.io/
Whole Webpage Screen Capture Conclusion
Despite failing to capture the World’s Longest Webpage, FBSC remains my go-to tool for full webpage screenshots, accounting for about 80% of my usage. While I acknowledge the benefits of using Google Docs, I prefer the familiarity and ease of saving images directly to my device. Of course, the usefulness of a tool ultimately depends on personal preference, and I recognize the advantages of Save to Google Drive. Ultimately, both FBSC and Google Docs are excellent programs, and I am confident that either option will suit your needs.
Alternative Screen Capturing Software
Aside from the tools mentioned in this article, there are many other screen-capturing software options available. Here are some of the most popular free and paid options:
Screen Capturing – Free Options:
-
Greenshot – A free, open-source tool that allows you to capture screenshots and annotate them.
-
Lightshot – A lightweight tool that lets you capture any part of your screen, edit the image, and share it online.
-
Snagit – A powerful screen capture and editing tool that offers a free trial version.
Screen Capturing – Paid options:
-
Camtasia – A premium screen recording and video editing software that also includes a screen capture feature.
-
FastStone Capture – A feature-rich screen capture software that lets you capture screenshots, record videos, and annotate images.
-
Ashampoo Snap – A comprehensive tool that lets you capture screenshots and videos, and edit them with various tools and effects.
These are just a few of the many screen-capturing software options available. Each has its own unique features and benefits, so be sure to do your research to find the one that best suits your needs.

